Notice Re: Boutique/Store Website

IMPORTANT NOTICE / MESSAGE IMPORTANT - TO ORDER please send us a message to magenta.magentastyle@gmail.com. Enter the code of the stamps you want to obtain (if necessary consult the Catalogs section) specifying whether you want a wooden or cling frame, your shipping address and phone number (optional) and if you have questions we will answer them. Thank you for your collaboration.

POUR COMMANDER svp nous faire parvenir un message à magenta.magentastyle@gmail.com. Inscrivez-y le code des étampes que vous désirez obtenir (au besoin consultez la section Catalogues) en spécifiant si vous désirez une monture en bois ou en cling (repositionnable), votre adresse et numéro de téléphone (facultatif) et si vous avez des questions nous y répondrons. Merci de votre collaboration.
Showing posts with label kraft paper /papier brun. Show all posts

Tuesday, 27 December 2022

Treats on Tuesday with Christine - La gâterie du mardi avec Christine


Hi everyone, I hope you all had a fun Christmas and are now relaxing playing with all your crafting toys.
For my card this week I decided to take my inspiration from a fellow team member Miranda Degenaars. Miranda is an amazing artist and recently has done a number of videos on using pencils on kraft card you can find them under Miracle Art Inspirations on YouTube.
I stamped the bird in Ranger Archival Potting soil, then masked the bird and stamped the flowers around. I started colouring the light areas in white pencil and used browns and black for the shading.  When I finished the shading I added a hint of colour to the leaves with green and pink on the flowers, it's very subtle. I distressed the edge of the card and attached it to a white card base.


Christine Alexander - DT Magenta

*****

Produits Magenta utilisés:
Magenta products used:

Monday, 29 April 2019

Savvy Creations with Cassandra / Créations avisées avec Cassandra


Hello Magenta Friends! Cassandra here today with a card featuring no-line pencil crayon colouring on kraft.


For this card, I used the cute spring Flowering Nest - Nesting Bird stamp. Because the image is 2.75” x 3.25” in dimension, I went with a 3 1/2" x 3 1/2" kraft card base. I positioned the cardbase and the stamp in a MISTI stamp positioning tool and stamped it with VersaMark ink two times to give a clear enough outline to follow for colouring. Then, I coloured the image using Staedtler colouring pencils, working from light to dark colours. As the colouring progressed, the VersaMark ink virtually disappears as it blends in. Once, I was happy with my colouring, I splattered a watered down mix of white acrylic paint. Once, that was dry, I stamped the A Little Bird Told Me... sentiment with VersaMark ink and heat set it with gold embossing powder. It appeared a little light on the kraft so to make it stand out a bit more, I took a sharp dark brown pencil crayon and added some shadows to the lettering.


*****

Magenta products used:
Using pencil crayons is a fun and relaxing way to colour a stamped image. I particularly love the soft look it creates on kraft paper especially with the no-line use of VersaMark. I hope you give this technique a try and be sure to share your results with us either: here on the blog with a link in the comments section below, on Instagram, or in our Facebook group.


Happy creating!

Cassandra - DT Magenta

Thursday, 15 March 2018

Birthday Flowers / Les fleurs d'anniversaire


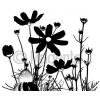
Cassandra here today with a watercolour card made from a silhouette image. I am very excited about many of the new products as part of the Spring/Summer 2018 release. I am especially loving the new silhouette images and the possibilities that they possess.


For my first creation from the collection, I made this birthday card with the Spring Silhouette Flowers using a MISTI and Zig Clean Color Real Brush markers on 4" x 6" 140 lb cold press watercolour paper.


I began by using the markers to individually colour sections and then spritz them with water before stamping onto the paper. That is the beauty of using a stamp positioning tool as you can do things with your stamped images that would be virtually impossible to do without them. I started with the yellow flowers. Then, I did the pink flowers. Next, the blue flowers and lastly, all the greens. As I transitioned between colours, I would clean off the stamp so as to not get mud. You can always go back in and repeat stamp a section until you are pleased with the colouring. I did go in and add a little brown to the echinachia centre in the end.


Once dry, I ran the green marker over a small patch of my craft mat and added some water and then used a watercolour brush to add splatters. While it was drying, I cut a piece of kraft scrap paper to 1 1/2" x 6". Using the MISTI, I stamped the Happy Birthday sentiment. Again, this was made possible because of utilizing a stamp positioning tool. I had cut the sentiment apart to that I could have the sentiment run horizontally verses its original stacked vertical positioning. I doodled in the diamonds between the sentiment repetitions.


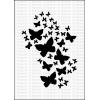
Now, I was ready to assemble the card. On a 4 1/2" x 6" cardbase, I adhered the kraft sentiment section to the bottom and then used a 4 1/4" x 5 3/4" piece of fun foam to adhere the watercolour panel at the top. Next, I adhered the two stripes of twine with one on the lower section and the other on the top edge. Lastly, I used the Flying Butterflies stencil and chose three of the smaller butterfly sizes to add the butterflies using a Stardust Gelly Roll pen to add a bit of sparkle.

I hope this tutorial gives you some ideas to expand your thinking around silhouette images and their potential for beautiful colourful creations.


*****

Magenta products used:
Produits Magenta utilisés:


Happy creating!

Cassandra - DT Magenta


Saturday, 27 January 2018

Page bonheur - Happy Page

Bonjour! 
Aujourd'hui, une petite page qui mets à l'honneur Miko mon petit chat. Il a un caractère spécial et bien à lui. J'ai voulu mettre en avant son côté mignon avec cette page. J'ai souhaité vous proposer une page différente dans des teintes marron et 2 photos. 

Hi!

Today, I wanted to share a layout in brown hues with two photos that showcase my little cat, Miko. He has a special character that is all his own. I wanted to highlight his cute side with this page.


J'ai étampé les fleurs de cerisier en bas à droite de ma page et en haut à gauche, j'ai mis en couleurs avec une peinture aquarelle chocolat et verte. 
J'ai ensuite travaillé la partie vers le centre de ma page, avec une aquarelle ocre, marron et chocolat très dilué. 
Avec le cache étoile, le pochoir lettre et le pochoir texture de cordage, j'ai texturé mon fond avec des encres distress de nuance marron. 
Avec ma distress marron, j'ai étampé le texte et l'étampe petits moments importants. En noir, ensuite j'ai étampé les étoiles et le texte pensée féline.
J'ai maté mes photos sur un bristol kraft, puis pour rester dans les teintes marron j'ai choisi des embellissements bois, un petit peu de masking tape. 
Pour finir, j'ai étampé le texte du temps des fêtes, découpé le mot bonheur que j'ai collé sur un des embellissements bois. 


To start, I stamped the cherry blossoms at the bottom right of my page and at the top left and coloured them chocolate and green watercolour paints.
Then, I worked the part towards the center of my page, with a watercolour ochre, brown, and very diluted chocolate.
With star cover, letter stencil, and rope texture stencils, I textured my background with distress inks in brown hues.
With my brown distress, I stamped the text and stamped "petits moments importants". Next, in black, I stamped the stars, and the feline thought text.
I matted my photos on a kraft paperboard. Then, to stay in the shades of brown, I chose wood embellishments and a little bit of masking tape.
Finally, I stamped the text of the Holiday Season, cut the word "Bonheur" (which means happiness) that I layered onto one of the wooden embellishments.


J'espère qu'elle saura vous inspiré cette petite page et vous donnez des idées.
I hope this page will inspired you and give you ideas.


*****

Produits Magenta utilisés:


Nessa VBA - DT Magenta


Monday, 15 January 2018

Avec amour - With Love


Sur un carton de papier kraft, j'ai étampé les fleurs avec l'encre Distress Oxides Vintage Photo et embossé à la poudre claire. J'ai effectué la mise en couleur des échinacées avec les crayons Néocolor et des Prismacolor. J'ai encré autour du sujet principal avec les encres Distress Oxides Vintage Photo et Fossilized Amber, j'ai aspergé d'eau et ensuite avec mon pochoir texture Brique et l'encre Distress Oxides Vintage Photo, j'ai ajouté de la texture.

On kraft paper, I stamped the Echinacea flowers with Vintage Photo Distress Oxide ink and heat embossed it with clear emboss powder. Then, I coloured the flowers with Neocolor crayons and Prismacolor pencil crayons. Next, I inked the background around the focal point with both Vintage Photo and Fossilized Amber Distress Oxides and spritzed it with water. Then, I used my Brick stencil with Vintage Photo Distress Oxide to add texture.


Pour un ajout intéressant, j'ai utilisé le pochoir de cœur avec de l'encre Distress vintage photo et Archival noir avec un doigt éponge pour former un cœur tout en douceur autour des échinacées. Le sentiment a été encré et embossé en blanc, les contours encrés avec l'Archival noir, pour terminer quelques éclaboussures de Gesso ont été ajoutés avec des traces de script.

To add more interest to the echinacea, I used the heart stencil and a finger sponge with Vintage Photo Distress ink and Black Archival ink to make a heart around them. Next, I stamped the sentiment and heat embossed it with white and inked the edges with Black Archival ink. To finish it off, I lightly stamped traces of the script and added splatters of gesso.


Détail de la mise en couleur des échinacées et de la texture obtenue avec les encres Distress Oxides.

Detail photo showing the colouring of the echinaceas and the texture obtained with the Distress Oxides.


******

Produits Magenta utilisés:
Magenta products used:


Mon pochoir
Texture de brique


Carole Dion - DT Magenta

Wednesday, 1 November 2017

Congratulations Card - Carte de félicitations

Hello my dear crafty friends and welcome to my new Magenta post.
This time, I decided to make a pretty simple card. Usually, I am more of a Mixed Media artist, but most of the crafters are card makers, so it's obligatory to show the way of doing Magenta cards here and there, even when it's mostly not your usual style.


Bonjour et bienvenue. Voici mon nouvel article.

Cette fois, j'ai décidé de faire une carte assez simple. Habituellement, je suis plus une artiste de techniques mixtes, mais la plupart des artisans sont des créateurs de cartes, il est donc obligatoire de montrer la façon de faire des cartes Magenta ici et là, même si ce n'est généralement pas mon style habituel.


This card was made over kraft cardstock with a thin layer of Magenta Spring Tapestry patterned cardstock as one of the layers to add some colour contrast to the bare Kraft color. The background was made with two Magenta stamps that were stamped with clear embossing ink and heat embossed with bright white embossing powder. The large stamp is the main image and the branches around the card were added as the filler for the background.
Then, I made a kind of paper piecing technique using the very same patterned paper as the stamping paper, but I made it with two layers of paper piecing for the larger flower.


Cette carte a été faite sur du papier kraft avec une fine couche de papier cartonné à motif de tapisserie de printemps Magenta comme l'une des couches pour ajouter un peu de contraste de couleur à la couleur Kraft. Le fond a été fait avec deux étampes Magenta qui ont été étampées et embossées avec de la poudre blanc brillant. L'étampe de fleur est l'image principale et les branches autour de la carte ont été ajoutées en tant que remplissage pour l'arrière-plan.

Ensuite, j'ai fait une sorte de technique de rattache de papier en utilisant le même papier à motifs que celui utilisé pour étamper, mais je l'ai fait avec deux couches de papier pour la plus grande fleur.


The green stamped flower was hand cut and glued directly over the stamped basic white image and then the second pink layer was glued partially over the green one. The sentiment was stamped in the same heat embossed way and added to the card.


La fleur étampée verte a été coupée à la main et collée directement sur l'image blanche de base étampée, puis la deuxième couche rose a été collée partiellement sur la verte. Le sentiment a été embossé et ajouté à la carte.
*****
Magenta products used:
Produits Magenta utilisés:

07.295.J

14.650 fleur

14.630


ME212


Thanks for being here with us today and see you soon again!


Merci d'être ici avec nous aujourd'hui et à bientôt!

Irit Shalom - DT Magenta


Friday, 5 August 2016

A butterfly in the meadow.. - Papillon dans un champs


This morning I thought of using some kraft paper - it always is a surprise how it turns out - white paper lends itself better as there is light already; as with craft the lack of white can be a problem sometimes.
I like how the butterfly and the white accents pop off the background!

PS.... I colored the background with PanPastel.

Ce matin j'ai pensé utilisé du papier kraft - c'est toujours une surprise - le papier blanc est plus facile puisqu'il y a déjà de la lumière alors que le papier kraft de par son manque de blanc peut-être un problème parfois.

J'aime comme le papillon et les accents blanc ressortent sur le fond!

PS... J'ai mis en couleur le fond avec des PanPastel,


Ellie Knol - DT Magenta

*****

Produits Magenta utilisés:
Magenta products used: