Notice Re: Boutique/Store Website

IMPORTANT NOTICE / MESSAGE IMPORTANT - TO ORDER please send us a message to magenta.magentastyle@gmail.com. Enter the code of the stamps you want to obtain (if necessary consult the Catalogs section) specifying whether you want a wooden or cling frame, your shipping address and phone number (optional) and if you have questions we will answer them. Thank you for your collaboration.

POUR COMMANDER svp nous faire parvenir un message à magenta.magentastyle@gmail.com. Inscrivez-y le code des étampes que vous désirez obtenir (au besoin consultez la section Catalogues) en spécifiant si vous désirez une monture en bois ou en cling (repositionnable), votre adresse et numéro de téléphone (facultatif) et si vous avez des questions nous y répondrons. Merci de votre collaboration.
Showing posts with label Magenta 07.975.I Happy Birthday. Show all posts

Saturday, 2 April 2022

Super Saturday with Pam – Super Samedis avec Pam

Welcome back to Super Saturday.  For today’s card I used Distress inks to watercolor the image. 
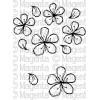
I positioned the large and small daisy stamps in my MISTI then used Mustard Seed Distress ink to stamp the images on a piece of watercolor paper. 
I used a very, damp (almost dry) brush to blend the color into the center of the petals.  I stamped the images again with Ripe Persimmon Distress ink.  After the panel dried, I stamped the images again with VersaMark ink and embossed with clear embossing powder.  I repeated the process with the small daisy stamp on another piece of watercolor paper. For the background I found a piece in my stash that I created by applying green Pan Pastels to a piece of textured white cardstock.  I trimmed it to 4” x 5 ¼”, then stamped the sentiment in the lower right corner and embossed with clear embossing powder.  I fussy cut the daisies, then adhered them to the background.  I used foam adhesive on the back of the large daisy to give it extra dimension then adhered the piece to an A2 card.  I added a few sequins for some added sparkle. 

Pam Nelson - DT Magenta

*****

Saturday, 15 May 2021

Super Saturday with Dianne / Les Super Samedis avec Dianne

I've been having a lot of fun with metallic watercolors over images stamped in pigment ink. Since the watercolors contain mica, they are opaque and you can paint over various parts of the stamped image.


I stamped the image using Delicata gold ink and painted parts of it over with Iuile metallic watercolors. I added a few dots of gold with a stylus.


I added the sentiment with Versamark ink and embossed using Ranger gold embossing powder. I was afraid that because the panel is textured the image would not be crisp enough with just the Delicata ink.


I love this image, and even though it is supposed to be a snowflake, I think it also looks like a flower.


Dianne Johnson - DT Magenta

*****

Produits Magenta utilisés:
Magenta products used:


Saturday, 1 May 2021

Super Saturday with Pam – Super Samedis avec Pam

Welcome back to Super Saturday.  There’s an old saying that “April showers bring May flowers.” The inspiration for this card comes from a card Kristina Werner posted on her blog which you can see here.

I started my version of the card by taping a piece of watercolor paper to a solid surface (in my case it’s an old cutting board) to prevent the paper from curling.   I applied watercolor paints in a rainbow order, starting with shades of green, then blue and finishing with a purple.  I set it aside to dry thoroughly before adding a second layer of paint.  You can also dry the paper with a heat tool.  For the second layer I used my Iuile watercolors.  They are so sparkly but they look their best on dark cardstock.  However, applying the colors over a base color created a soft, shimmery background.  I chose colors that were similar to the colors I used in the first layer.  Also, it’s important to use a very small amount of water so the base color isn’t reactivated. 
It’s hard to capture the shimmer effect but in real life there’s a beautiful glow on the cardstock. After the second layer of color was dry, I removed the tape and cut the piece to 4” x 5 ¼”.  I placed it in my stamp positioner and stamped the large floral image from the “English Garden” stamp set using light green ink.  I colored the image with colored pencils then returned the piece to my stamp positioner.  I stamped the image again using VersaMark and then embossed with white embossing powder.  I repositioned the stamp, stamped again with green ink, then colored and embossed.  I stamped and embossed the “Happy Birthday sentiment then stamped, colored and embossed the floral image one more time.  
I also stamped the small leaf the comes with the “English Garden” stamp set in the lower right corner.  The last step was to adhere the image to an A2 card made from Kraft cardstock.  One last tip, when I’m planning to stamp an image multiple times, I make a sample.  I cut a piece of scrap paper the same size as my cardstock and then use it to test my layout or in the case of this card, repositioning the stamp several times to determine the best layout.  

Pam Nelson - DT Magenta

*****

Produits Magenta utilisés:
Magenta products used:

Saturday, 20 February 2021

Super Saturday with Pam – Super Samedis avec Pam


Welcome back to Magenta Super Saturday!  I had so much fun making these cards.  I stamped and painted one large image then cut it into three pieces to create three cards.

I stamped the Floral Background stamp onto a piece of black watercolor paper with VersaMark ink, then embossed with gold embossing powder.  I taped the piece to a board then painted the flowers, leaves and berries with some beautiful Iuile watercolors that I found on the Etsy website. 
The watercolor paper I used is kind of delicate and to get a clean cut you need to use dies or a guillotine cutter. I let the piece dry well then used dies to cut out two 2 3/8” squares from one side of the image.  I used a guillotine cutter to cut a strip 1 5/8” x 5”.    I cut pieces of coordinating solid color cardstock to mat each of the images.  I also cut cream cardstock – 3 ¼” x 4 ½” for the square images and 3 ¾” x 5” for the vertical piece.  I stamped the sentiments and embossed the images on the cream cardstock (gold embossing powder for the happy birthday, clear embossing powder for the other two cards.) 
I positioned (but didn’t attach) each painted image on a piece of cream cardstock.  I wanted to add a bit of interest to the cream cardstock so I used VersaMark ink to stamp the small flower petal from the Petal Blossoms set a few times around the image and sentiment.
I adhered the cream cardstock onto pieces of solid cardstock, adhered the painted images and adhered everything to an A2 card.   
Thanks for visiting the Magenta blog today.
Pam Nelson - DT Magenta

*****

Saturday, 18 July 2020

Super Saturday with Pam – Super Samedis avec Pam

Welcome back to Magenta Super Saturday. 
I had so much fun creating today’s card and I hope you will enjoy it, too.  


Bienvenue à Magenta Super Saturday.

J'ai eu tellement de plaisir à créer la carte d'aujourd'hui et j'espère que vous l'apprécierez aussi.


I began with a a piece of 110# white cardstock to which was cut to 4 1/8” x 5 ¼”.  I used a blending brush to cover the entire piece with Distress Speckled Egg ink.  Next, I applied Distress Broken China ink around the outer edges, making an inked border of approximately 1” wide around all sides.  Finally, I blended Distress Mermaid Lagoon ink along the very outer edges of all four sides. 
When the cardstock was very dry, I stamped “Happy Birthday” in the center of the card using black ink, then embossed with clear embossing powder.  I die cut the center of the card using an oval stitched die and set the oval piece aside for later.
I taped the Petal Blossoms stencil to the front of the cardstock and blended Distress Wilted Violet over the top.  I removed the stencil and wiped the excess ink away, then repositioned the stencil back on the cardstock.  Using a palette knife, I applied Stickles Glitter Gel over the top.  (There are lots of glittery products on the market so any them would work.  You could also apply embossing paste on the stencil then sprinkle glitter over the top.)  I removed the stencil, wiped the gel from the edges of the card and set it aside to dry.  I also washed the stencil and palette knife immediately.
When the gel was dry, I adhered the cardstock to the front of an A2 card. I adhered the oval sentiment to a piece of fun foam and then positioned it in the cutout area of the card. 


J'ai commencé avec un morceau de papier cartonné blanc de 110 # coupé à 4 1/8 "x 5 ¼". J'ai utilisé un pinceau mélangeur pour couvrir la pièce entière avec de l'encre Distress "Speckled Egg". Ensuite, j'ai appliqué de l'encre Distress "Broken China" sur les bords extérieurs, créant une bordure encrée d'environ 1 ”de large sur tous les côtés. Enfin, j'ai mélangé l'encre Distress "Mermaid Lagoon" le long des bords extérieurs des quatre côtés. Lorsque le papier cartonné était très sec, j'ai étampé «Joyeux anniversaire» au centre de la carte avec de l'encre noire, puis embossé avec de la poudre à embosser transparente. J'ai découpé le centre de la carte à l'aide d'un moule cousu ovale et mis de côté la pièce ovale pour plus tard. 
J'ai collé le pochoir Fleurs de pétales à l'avant du papier cartonné et j'ai mélangé du Distress "Wilted Violet" sur le dessus. J'ai retiré le pochoir et essuyé l'excès d'encre, puis j'ai repositionné le pochoir sur le papier cartonné. À l'aide d'un couteau à palette, j'ai appliqué le Stick Glitter Gel par-dessus. (Il y a beaucoup de produits pailletés sur le marché, donc tous pourraient fonctionner. Vous pouvez également appliquer de la pâte à embosser sur le pochoir, puis saupoudrer de paillettes sur le dessus.) J'ai retiré le pochoir, j'ai essuyé le gel des bords de la carte et l'ai posé de côté pour sécher. J'ai également lavé le pochoir et le couteau à palette immédiatement. 
Lorsque le gel était sec, j'ai collé le papier cartonné à l'avant d'une carte A2. J'ai collé le sentiment ovale à un morceau de mousse, puis je l'ai positionné dans la zone de découpe de la carte.


I also created a second card using Distress Oxide inks in the same colors.  For the stenciling I used the leaves template from the Floral Background Trio stencil set and Distress Mowed Lawn Oxide Ink. 

J'ai également créé une deuxième carte en utilisant des encres Distress Oxide dans les mêmes couleurs. Pour le pochoir, j'ai utilisé le modèle de feuilles de l'ensemble de pochoirs Floral Background Trio et de l'encre Distress Oxide couleur "Mowed Lawn" .


Pam Nelson - DT Magenta

*****

Produits Magenta utilisés:
Magenta products used:

TM334
07.975.I
TM27