Hello crafty people,
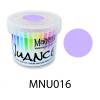
I have another step by step tutorial for you with the beautiful Nuance.
Voici pour vous un autre pas à pas avec les poudres Nuance.
I have another step by step tutorial for you with the beautiful Nuance.
Voici pour vous un autre pas à pas avec les poudres Nuance.
Step 1:
Place the stencil on top of a piece of watercolor paper.
Adhere gesso thru the stencil with a spatula.
1. Placez le pochoir sur un papier aquarelle. A l'aide d'une spatule appliquez du gesso.
Once the gesso is dry you can stamp the background stamp with Archival black. I did not re-ink the stamp for the 2nd and 3rd print.
Une fois le gesso sec vous pouvez étamper l'étampe texture avec de l'encre noire Archival. Je n'ai pas réencré l'étampe pour la deuxième et la troisième impression.
Step 3:
Sprinkle some Nuance colors directly onto your background and spritz some water. With a brush you can control and blend the colors.
Add more color as needed.
3. Saupoudrez quelques couleurs de Nuance directement sur le papier et vaporisez un peu d'eau.
Step 4:
Go around the edges with a brown distress crayon and smooth out the color. This will give your card more depth.
4. Avec un crayon Distress brun faites les contours du papier et estompez la couleur. Cela ajoute de la profondeur.
Step 5:
To give the background more interest stamp the script partially on your background with a purple Memento ink.
5. Pour ajouter de l'intérêt au fond, étampez partiellement l'étampe texte avec de l'encre Memento mauve.
Step 6:
Stamp the butterfly with Archival black on a seperate piece of watercolor paper.
Color the butterfly with Nuance diluted with water. Dry it with your heat tool and cut out the butterfly.
6. Etampez sur un autre morceau de papier aquarelle avec de l'encre Archival noire le papillon. Mettez la couleur au pinceau avec des Nuance diluées dans de l'eau. Faites sécher avec un fusil à embosser et découpez le papillon.
Step 7:
Stamp the text twice with black Archival ink on a separate piece of white cardstock. By stamping it twice you are able to trim all the sentences nicely.
7. Etampez le texte deux fois avec de l'encre Archival noire sur un papier carton blanc. En étampant deux fois, vous serez capable de découper les phrases comme vous le voulez.
Step 8:
You are now ready to adhere everything onto your background and adhere the background onto a white card base.
I also used some scooped paper underneath the butterfly.
8. Vous êtes maintenant prête à coller le tout. J'ai aussi ajouté un papier déchiré sous le papillon.
Mariëtte van Leeuwen - DT Magenta
*****
Produits Magenta utilisés:
Magenta products used:


1 comment:
That's really beautiful, Mariette! I love the colour combination you used, and the gesso is a wonderful resist! Thanks for the step by step!
Post a Comment