
Hello Magenta friends! My name is Norine Borys and I'm happy and delighted to be here today and a few more times over the next few weeks, to share some projects with you! I'm a Canadian who lives now in Arizona, but I've also lived for 1.5 years in Gatineau, QC! My 4 children are grown and live all over North America, and we have one grandchild who lives in Minnesota. I discovered Magenta products a few years ago at a stamp convention in Mesa, AZ and have enjoyed using their stamps, stencils and Nuance powders ever since! You can find me on Instagram @norinehope and on Facebook, as well as on my blog at The Velvet Lemon. I hope you'll come and visit me in any or all of those places!
Bonjour les amies de Magenta! Mon nom est Norine Borys et je suis heureuse et ravie d'être ici aujourd'hui et encore quelques fois au cours des prochaines semaines, pour partager quelques projets avec vous! Je suis une Canadienne qui vit maintenant en Arizona, mais j'ai aussi vécu pendant un an et demi à Gatineau, QC! Mes 4 enfants sont adultes et vivent dans toute l'Amérique du Nord, et nous avons un petit-fils qui vit au Minnesota. J'ai découvert les produits Magenta il y a quelques années lors d'une convention à Mesa, AZ et j'ai toujours aimé utiliser leurs étampes, pochoirs et poudres Nuance! Vous pouvez me retrouver sur Instagram @norinehope et sur Facebook, ainsi que sur mon blog au Velvet Lemon. J'espère que vous viendrez me rendre visite dans tous ces endroits!

Pour mon premier projet, je reviens au tout début de mon introduction à Magenta! À cette convention d'étampes, j'ai vu quelques cartes, et j'ai regardé une démo qui m'intéressait beaucoup. C'était une technique qui impliquait de peindre à travers un pochoir avec des poudres Nuance, et parce que vous utilisez des pochoirs et des poudres soluble à l'eau, c'est une technique qui exige une haute tolérance pour l'imperfection! Mais l'imperfection peut aussi être très belle et artistique!

This first card is very much like the original samples I saw, where the colour was loosely painted through the stencil openings onto watercolour paper and then "drawn out" with a paint brush to spread the colour in a loose wash. Then, when the paint is dry, you replace the stencil over the paper again and loosely outline the shapes with a white pen. I used a Signo Uniball white pen. To complete the card, I stamped a sentiment, then die cut a square around the sentiment, popped it up with foam tape for extra dimension, and adhered it back into the opening. Then, I added a variety of coloured sequins to finish it off.
Cette première carte ressemble beaucoup aux échantillons originaux que j'ai vus, où la couleur a été vaguement peinte à travers les ouvertures du pochoir sur du papier aquarelle et ensuite "étirée" avec un pinceau pour étaler la couleur dans un lavis. Puis, lorsque la peinture est sèche, replacez le pochoir sur le papier et dessinez les formes avec un stylo blanc. J'ai utilisé un stylo blanc Signo Uniball. Pour compléter la carte, j'ai étampé un sentiment, puis j'ai découpé un carré autour du sentiment, je l'ai fait ressortir avec du ruban adhésif pour une dimension supplémentaire et je l'ai collé dans l'ouverture. Ensuite, j'ai ajouté une variété de paillettes colorées pour terminer.

For this card, I used a much paler palette of colours, by adding more water to the Nuance powders and I filled in the background of the watercolour paper panel, with more of the same colours, until the original stencilled design was almost indistinguishable.
Pour cette carte, j'ai utilisé une palette de couleurs beaucoup plus pâles, en ajoutant plus d'eau aux poudres Nuance et j'ai rempli le fond du panneau de papier aquarelle, avec plus de mêmes couleurs, jusqu'à ce que le dessin original au pochoir soit presque indiscernable.

This time I outlined the design with a fine tipped Copic Multi-liner pen. Next, I stamped the script stamp with indistinct edges, and finally, added the sentiment. I also added Glossy Accents to each of the berries, although that's difficult to see in the photograph.
Cette fois, j'ai souligné le dessin avec un stylo Multi-liner Copic à pointe fine. Ensuite, j'ai étampé le script avec des bords indistincts, et enfin, j'ai ajouté le sentiment. J'ai également ajouté des accents brillants à chacune des baies, bien que cela soit difficile à voir sur la photo.

For this last card, I flipped the stencil over to have the bough coming from the opposite direction.
Pour cette dernière carte, j'ai retourné le pochoir pour avoir la branche venant de la direction opposée.

Once more I painted through the openings with diluted Nuance powders, and drew out the colour into the background of the design. I let it air-dry naturally, traced the outlines through the stencil and then went back and added more pen lines with a very scribbly hand. I stamped the sentiment onto the card front, but felt that it still needed more, so I drew lines with a straight-edge ruler on the corners and added more squiggles to that.
Une fois de plus, j'ai peint à travers les ouvertures avec des poudres Nuance diluées, et j'ai dessiné la couleur dans le fond du dessin. Je l'ai laissé sécher à l'air, tracé les contours à travers le pochoir, puis je suis revenue et j'ai ajouté d'autres lignes de stylo très gribouillées. J'ai étampé le sentiment sur le devant de la carte, mais j'ai senti qu'il en fallait encore plus, alors j'ai dessiné des lignes droites avec une règle sur les coins et ajouté plus de gribouillis à cela.

*****
Magenta products used:
Produits Magenta utilisés:
Produits Magenta utilisés:
 |
| TM42 |
 |
| 07.533.F |
 |
| 07.869.D |
 |
| 07.916.O |
 |
| 07.711.G |
 |
| MNU004 |
 |
| MNU009 |
 |
| MNU027 |
 |
| MNU024 |
 |
| MNU012 |
 |
| MNU016 |
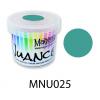 |
| MNU025 |
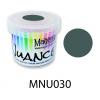 |
| MNU030 |
*****
For your interest, I made a little colour swatch card of the colours of Nuance I currently have because I find that to be a truer indication of their colour shades.
Pour votre intérêt, j'ai fait un nuancier des couleurs de Nuance que j'ai actuellement parce que je trouve que c'est une indication plus vraie de leurs nuances de couleur.

Thank you to Magenta for the invitation to showcase and share their products with you here!! And thank YOU for coming here today! I'll be back with another project in two weeks!
Merci à Magenta pour l'invitation à présenter et partager leurs produits ici!! Et merci d'être venu ici aujourd'hui! Je serai de retour avec un autre projet dans deux semaines!
Norine Borys - DT Magenta
3 comments:
It is not only lovely, but so inspiring! Even the layout of your pictures is charming. Thank you Norine.
Norine, your cards are perfectly imperfect. Love them all. Can't wait to see what you create next !
Love the use of the stencil, such beautiful cards :)
Post a Comment